Tampilkan postingan dengan label Beginners Guide. Tampilkan semua postingan

Rabu, 22 Mei 2013

How to Resize All Images Automatically in Blogger

From time to time people send us emails asking a very common question, does there is any way to resize all the images of their blogger blog? Sometimes images of large magnitude flow out of the content this not only disappoint your readers, but also affect your online reputations.  Blogger provides basic options for resizing images, but this not a practical approach and does not fit the blogs designs well.  Fortunately, a straightforward CSS tweak makes it possible to automatically modify each and every image on your site. In this article, we will show you How to Resize All Images in Blogger?

Resizing pictures one-by-one manually is acceptable, but what you would do, if your site has thousands of photos and screenshots. Will you still edit them manually? Even if you decided to do so it would take months or even more than that. Therefore, it is essential to resize them manually through a straightforward CSS coding. Through this approach, you can also revert the size of images back to their original size.
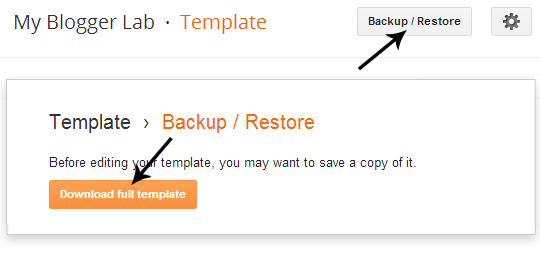
The First thing you need to do is to go to Blogger.com >> your site >> Template >> Edit HTML. Now within the new Blogger HTML Editor search for the ]]></b:skin> tag and just above it paste the following CSS coding. (Quick Tip: If you are unable to find the skin tag, then first click anywhere on the HTML Editor and Press CTRL+F to operate the built in search option connected to the HTML Editor). 


.post-body img {
width: 500px!important;
height: auto!important; }
Now change the values of Width and height, according to your needs. You can even add a border to your images through (border: 1px solid #d2d2d2) a modest border CSS command. After customizing, press the “Save Template” button and that’s all. 
We hope this technique would help you in resizing your old images. If we have missed something or you know a much simpler way of tackling this problem then, the below comment section is all yours. 


How to Backup Your Blogger Posts and Comments Manually

Being a blogger user, there is no assurance that your blog is safe from removal, that’s the price of using the platform for free. Since, your site is hosted at Google servers. Therefore, if your site does not comply with their Terms and services they will delete your site without even giving a second chance.  You may have heard from many co-Blogger users that their websites are getting vanished overnight. As a Google blogger, there is no way of retrieving your deleted blog. The only thing you can do to protect yourself is to take a backup of your site. In this Article, we will show you how to take backup your Blogger Blog.

Probably this is the price of using this platform for free. Just imagine the feeling of a person who spends days and nights in putting up his website, and suddenly Google removes his site due to some violation in terms. Things cannot get worse than that. 
How To Backup of Posts, Pages and Images?
To Backup your website go to Blogger.com >> Settings >> Other >> Export your blog. Now a new window will appear, just select the orange “Download Blog” button and a file will be downloaded which would be in “XML” format. That file possesses all the data and details about your blog including posts, images, and pages. The downloaded file can be used on WordPress, or any other popular platform.
How to Backup Template?
If anyone is wondering how to take back up of their template, then he can go to Blogger >> Template >> Backup/Restore. Now press “Download the full template” button and template is successfully backed up. The downloaded file would be in XML format and it cannot be used on any other platform except Blogger.
That’s all folks, now your blog is successfully backed up. In the future, if your site got deleted, then you can use this back up and can migrate your whole site to WordPress without even losing a single Search engine ranking. By using 301 permanent redirects, we can easily redirect all the traffic to the new self-hosted WordPress site. However, without backup you have to give a kick start to your career once again.